Help - Pop up window

Doctor Agon
18 Oct 2017, 21:29Hi,
Whilst looking over some of the help-sheets regarding modifying the UI, I came across the following link:
https://textadventures.co.uk/forum/samples/topic/5111/how-to-modify-the-user-interface#top
In particular the post by The Pixie, dated 1st June 2015, featuring a command box and a help - pop up window, of which the command box has since been added to quest. It is the help box I'd like some help(lol) with or guidance.
I've isolated the code for the help routine here:
<stuff><![CDATA[
<div id="dialog_window_1" class="dialog_window" title="Help">
<p id="page0">Welcome to <i>UI Example</i> help system. Click the buttons at the bottom to see different stuff!</p>
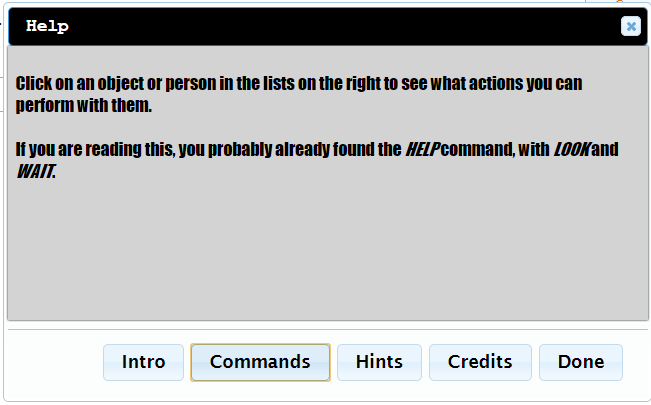
<p id="page1" style="display:none;">Click on an object or person in the lists on the right to see what actions you can perform with them.<br/><br/>If you are reading this, you probably already found the <i>HELP</i> command, with <i>LOOK</i> and <i>WAIT</i>.</p>
<p id="page2" style="display:none;">Just try clicking stuff. Seriously, how hard can it be?</p>
<p id="page3" style="display:none;">Created by The Pixie.<br/><br/>Thanks to Alex Warren for creating Quest, and to members of the forum for various bits of code, in particular The Pixie for this interface stuff (bits of which originate with Jay Nabonne).<br/><br/>Feel free to use and abuse this in your own games!</p>
</div>
<script>
function setPage(page) {
$('#page0').css('display', 'none');
$('#page1').css('display', 'none');
$('#page2').css('display', 'none');
$('#page3').css('display', 'none');
$('#page' + page).css('display', 'block');
}
$(document).ready(function () {
$('#dialog_window_1').dialog({
autoOpen: false,
height: 400,
width: 640,
buttons: {
"Intro": function() { setPage(0);},
"Commands": function() { setPage(1);},
"Hints": function() { setPage(2);},
"Credits": function() { setPage(3);},
"Done": function() { $(this).dialog("close");}
}
});
});
</script>
]]></stuff>
I've pasted it into my game after the published line, put the line below into the start script:
OutputTextNoBr (game.stuff)
and altered the help command to call the dialog window:
JS.eval ("$('#dialog_window_1').dialog('open')")
Can the coding for the game.stuff attribute be written directly into the GUI. Am I right in assuming that the 'div' statements are message statements and the only 'JS.eval' coding are the functions, and if so how do I do that. I'm not really a fan of switching between code view and GUI every time I want to do something, prefer writing using the GUI.
Also I'd like to know more about how to add more buttons, how to change the colour of the window or what some of the coding means or does, eg. the line below:
$('#page' + page).css('display', 'block');
I realise this is a lot of questions. Or maybe a more detailed help-sheet is required for the 'help window'.
Hope some of you can help.

mrangel
18 Oct 2017, 22:52The last question is simple enough.
$('#page0').css('display', 'none'); finds an HTML element with id="page0", and sets its "display" property to "none" making it invisible. There's 4 of those lines, making page0, page1, page2, and page3 invisible.
Then $('#page' + page).css('display', 'block'); takes the one element whose number you passed to it, and makes that one visible again by setting its "display" property to something other than "none". There are a few options, that make an element display in different ways, but "block" is the most common. (in this case, the element is a bit that starts with <p and ends with </p>).

hegemonkhan
18 Oct 2017, 23:22(filler for getting my edited post, updated/posted)
here's the doc for using the web languages (html, css, JS:JavaScript, xml, etc):
https://www.w3schools.com
'html' is used to create the web elements
'css' is used to format/position/etc ("how the webpage looks/appears") the web elements
'JS (JavaScript)' is used for programming in the actions/events of the web elements/page/site
html
<p>the 'p' tag line stands for paragraph: a block of text/strings/sentences, blah blah blah </p>

<h1>the 'h1' stands for header, and the numbers (~ 1 to 7) are different levels/layers of headers (smaller/larger font size)</h1>

<body>CONTENT</body>

<title>CONTENT</title>

etc etc etc
here's a very simple webpage:
create a text file on your desktop (right click on desktop, and choose 'notepad/wordpad/Apple: texteditor', and save the file on your desktop as 'xxx.txt'
open it up and copy and paste this into it:
<html>

  <title>My Simple Webpage</title>

  <body>

    <h1>Header for my simple webpage</h1>
    <br>
    <p>welcome to my simple webpage</p>

  </body>

</html>
now save the file and close out of it
lastly, click on it (start/open) it up (hopefully it'll open into one of your web browsers)... and .... tada.... you're looking at your own simple webpage!
'div' are elements that you use to create windows/frames for your UI/GUI, which you can then add whatever you want onto that frame/window (div Element). Think of a 'div' as like a window/frame Object, which you can then add stuff to it and set its position on the screen, its own size, the stuff you add to it own position on the div/frame/window, etc etc etc.
Doctor Agon
19 Oct 2017, 04:03Ok. Thanks. I'll get on to that website HK and have a look.

For some reason, you can only enter one line of text into the string field of an attribute. I believe that's why Pixie goes full Code View.
You can write that same thing inline and paste that one line in the GUI.
<div id="dialog_window_1" class="dialog_window" title="Help"><p id="page0">Welcome to <i>UI Example</i> help system. Click the buttons at the bottom to see different stuff!</p><p id="page1" style="display:none;">Click on an object or person in the lists on the right to see what actions you can perform with them.<br/><br/>If you are reading this, you probably already found the <i>HELP</i> command, with <i>LOOK</i> and <i>WAIT</i>.</p><p id="page2" style="display:none;">Just try clicking stuff. Seriously, how hard can it be?</p><p id="page3" style="display:none;">Created by The Pixie.<br/><br/>Thanks to Alex Warren for creating Quest, and to members of the forum for various bits of code, in particular The Pixie for this interface stuff (bits of which originate with Jay Nabonne).<br/><br/>Feel free to use and abuse this in your own games!</p></div><script>function setPage(page) {$('#page0').css('display', 'none');$('#page1').css('display', 'none');$('#page2').css('display', 'none');$('#page3').css('display', 'none');$('#page' + page).css('display', 'block');};$(document).ready(function () {$('#dialog_window_1').dialog({autoOpen: false,height: 400,width: 640,buttons: {"Intro": function() { setPage(0);},"Commands": function() { setPage(1);}, "Hints": function() { setPage(2);}, "Credits": function() { setPage(3);}, "Done": function() { $(this).dialog("close");} }});});</script>
I've never seen this, by the way. It's pretty sweet.
Thanks for calling attention to it!
NOTE: All I did was remove the line breaks.
There are numerous ways to change the display settings. Here's one way:
$('#page1').css('display', 'none').css('background', 'yellow').css('color', 'green').css('padding', '8px').css('font-weight', 'bold');
I added all the text in boldface.
Here's an easier way:
Again, I added all the text in boldface.
<p id="page1" style="display:none;color:green;background:yellow;font-weight:bold;padding:8px">Click on an object ...
You can also do it after the fact.
After entering the first room for the first time
JS.setCss("#page1", "color:green;background:yellow;font-weight:bold;padding:8px")


You want to find out the id of the element you wish to modify?
Click the magnifying glass in the HTML tools window, then hover over the part of the game you want to change. (It's #page1 we're looking for in this example.)

You should definitely peruse that page you linked to each time you get a new code to work, and I bet you'll find that you understand things that were Greek the first time you read over it. (That's how it works for me, anyway.)
When in doubt, I make a copy of my game and go to town. I change this. I change that...
Here's an easy way to test your JS pimping during play:
Command pattern
JS.#text#
Script
JS.eval(text)
With that, you can use JS.setCss and JS.eval and anything that begins with JS. during play. It's nice to have to test things out!
Doctor Agon
19 Oct 2017, 08:07Thanks KV, I'm always testing things out. Still learning.
Still playing with this...
This changes the background of the actual popup window:
JS.setCss ("#dialog_window_1", "box-shadow:0 0 2px black;color:green;background:yellow;font-weight:bold;padding:8px")

JS.setCss ("#dialog_window_1", "box-shadow:0 0 2px black;color:black;background:lightgray;padding:8px;font-family:fantasy")
JS.setCss (".ui-button-text", "color:black;")
JS.setCss (".ui-dialog-titlebar", "background:black;font-family:monospace;")
Doctor Agon
19 Oct 2017, 21:57That's brilliant KV.
I just need to have a play around with it myself. I really must get a handle on all these JS.setCss commands.
Well, thank you, but Pixie added the setCss function. He's the Wise One. (I'm just a savant. Hehehe.)
JS.setCss really just lets us add normal CSS.
You could do the same thing this way (like a normal HTML):
<stuff>
<![CDATA[
<style>
#dialog_window_1  {box-shadow:0 0 2px black;color:black;background:lightgray;padding:8px;font-family:fantasy;}
.ui-button-text {color:black;}
.ui-dialog-titlebar {background:black;font-family:monospace;}
</style>
<div id="dialog_window_1" class="dialog_window" title="Help">
<p id="page0">Welcome to <i>UI Example</i> help system. Click the buttons at the bottom to see different stuff!</p>
<p id="page1" style="display:none;">Click on an object or person in the lists on the right to see what actions you can perform with them.<br/><br/>If you are reading this, you probably already found the <i>HELP</i> command, with <i>LOOK</i> and <i>WAIT</i>.</p>
<p id="page2" style="display:none;">Just try clicking stuff. Seriously, how hard can it be?</p>
<p id="page3" style="display:none;">Created by The Pixie.<br/><br/>Thanks to Alex Warren for creating Quest, and to members of the forum for various bits of code, in particular The Pixie for this interface stuff (bits of which originate with Jay Nabonne).<br/><br/>Feel free to use and abuse this in your own games!</p>
</div>
<script>
function setPage(page) {
    $('#page0').css('display', 'none');
    $('#page1').css('display', 'none');
    $('#page2').css('display', 'none');
    $('#page3').css('display', 'none');
    $('#page' + page).css('display', 'block');
}

$(document).ready(function () {
    $('#dialog_window_1').dialog({
        autoOpen: false,
        height: 400,
        width: 640,
        buttons: {
            "Intro": function() { setPage(0);},
            "Commands": function() { setPage(1);},
            "Hints": function() { setPage(2);},
            "Credits": function() { setPage(3);},
            "Done": function() {
            $(this).dialog("close");}
        }
    });
});
</script>
]]>
</stuff>
You could also format the style element like so:
<style>
#dialog_window_1  {
    box-shadow:0 0 2px black;
    color:black;
    background:lightgray;
    padding:8px;
    font-family:fantasy;}
.ui-button-text {
    color:black;
}
.ui-dialog-titlebar {
    background:black;
    font-family:monospace;
}
</style>